Importing and uploading contacts into rezora
Use the Import from CSV FIle option to import contacts into your rezora account in bulk.
Written By Danny Schaffer
Importing and uploading your contacts in rezora is simple! Use the video or the article below to discover the next steps!
So you've got a CSV file of contacts that you're looking to add to your rezora agent account. Below, we cover the process, step by step. The video above covers the same process.
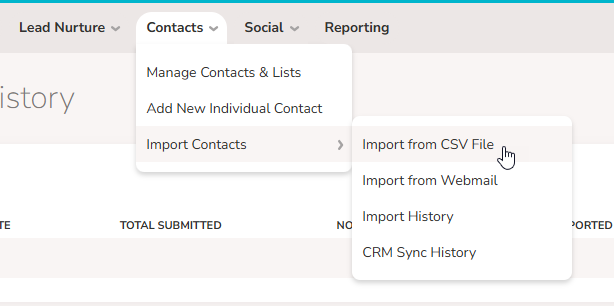
Hover over Contacts >> Import Contacts and then click on Import from CSV File
If you need a CSV file to work from:
If you need a CSV file to work from:
This page provides an overview of the process. If you don't have a good file to work from, you can export a file from whatever program you are using (Gmail, Outlook, etc) or simply click the "download our empty CSV template here" text in Step 1 to download a blank CSV file that you can use as a guide.
Click Begin Importing to reach the Contact importer modal.
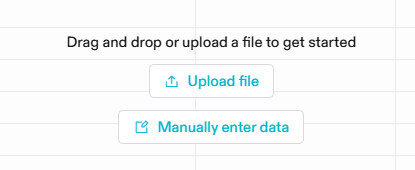
Click the "Upload file" button to browse your computer and select the file you'd like to import, or simply drag and drop the file from your desktop into the main area.
Adding a file will take you to the Map Fields step. This allows you to match the Incoming fields from your file (LEFT) to the Destination fields in our system (RIGHT). Click the down arrow to the right of the field name to change the Destination (rezora) field.
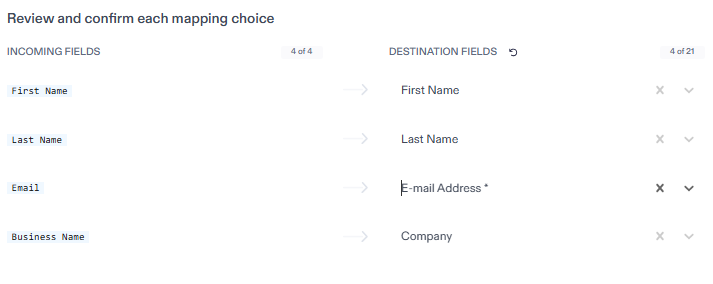
We do our best to match the column title to a valid field in our system by default. When you've mapped all relevant fields you wish to import to a rezora Destination field, click Continue at the top right to move forward.
Click Continue to accept the mapping.
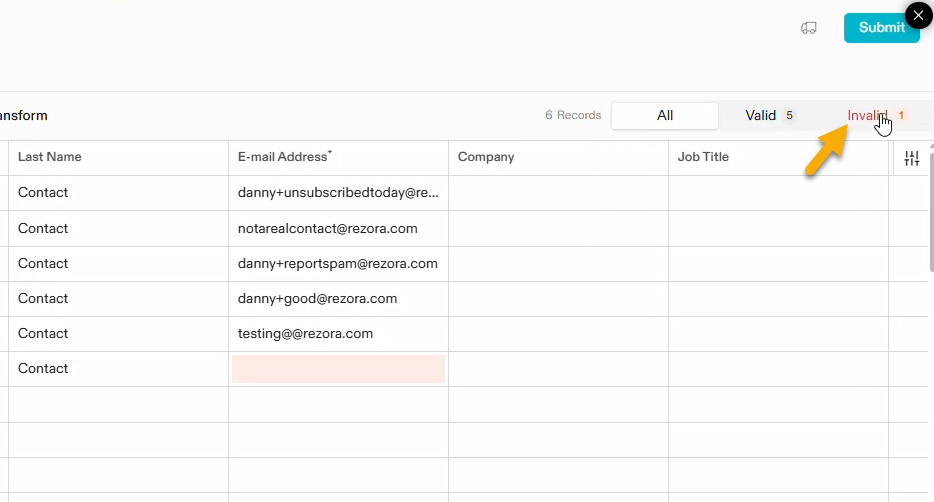
Check for Invalid contacts by clicking the Invalid tab at the top right.
Click Invalid to view contacts with email addresses that appear to be invalid (duplicates in file, missing an @, no email address present, etc). You can make any final changes to the data here before importing, allowing you to fix any obvious issues with the email address.
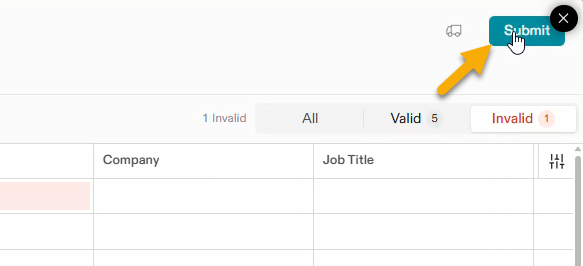
Click Submit to be taken to the final page of the import process. Note: If there are any rows with recognized problems in the E-mail Address column, those will be skipped in the import process.
Configure “Step 3: Let us know how we should handle CSV contacts that already exist in your rezora account.” Generally, you’ll want to leave it as “
What is the difference between “Keep CSV contacts” and “Keep existing rezora contacts?”
What is the difference between “Keep CSV contacts” and “Keep existing rezora contacts?”
Keep CSV contacts - If the file you are importing has the most up-to-date information on your contacts, keep this option clicked.
Keep existing rezora contacts - If you're importing an old file or you do not want to update existing contact information for any other reason, this may be the option for you.

In the “Step 4: Tell us if you’d like to add these new contacts to a List or Sphere (recommended).” section, click the Add to Lists of Spheres button to select existing lists or spheres, or click Create a New List to create a new list.
Note: All contacts in the imported file will be added to the selected lists/spheres

Click the Execute Import button to import your contact file!
If your import shows all of the contacts under “Not imported:
Check for Invalid contact errors. Note that our system requires that email address fields contain the email address and no extra characters, such as leading or trailing spaces, returns, or special characters.
If you see all contacts you import with an “Invalid Syntax” issue, but don’t spot anything on a quick visual inspection, check your file for these hidden spaces. In your spreadsheet program, you can select the column containing your email data and use a find and replace function to remove any spaces.
Was this helpful?
Still need help? Ask the team