Activating a Drip Campaign (Video)
Written By Danny Schaffer
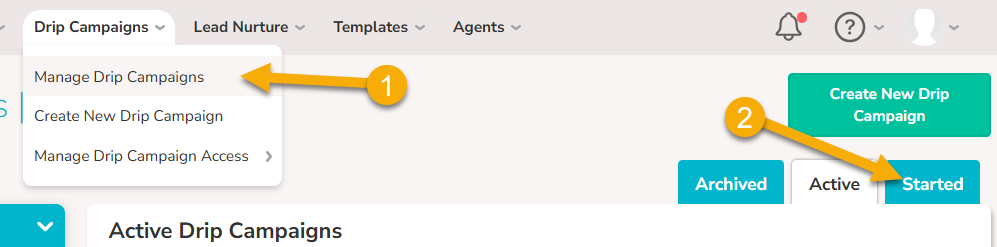
As an Admin, you’ve built your Drip Campaign, and now it’s time to share it. Hover over Drip Campaigns in the main menu and click Manage Drip Campaigns. When the page loads, click the Started tab to find your started content.
Activating a Drip Campaign
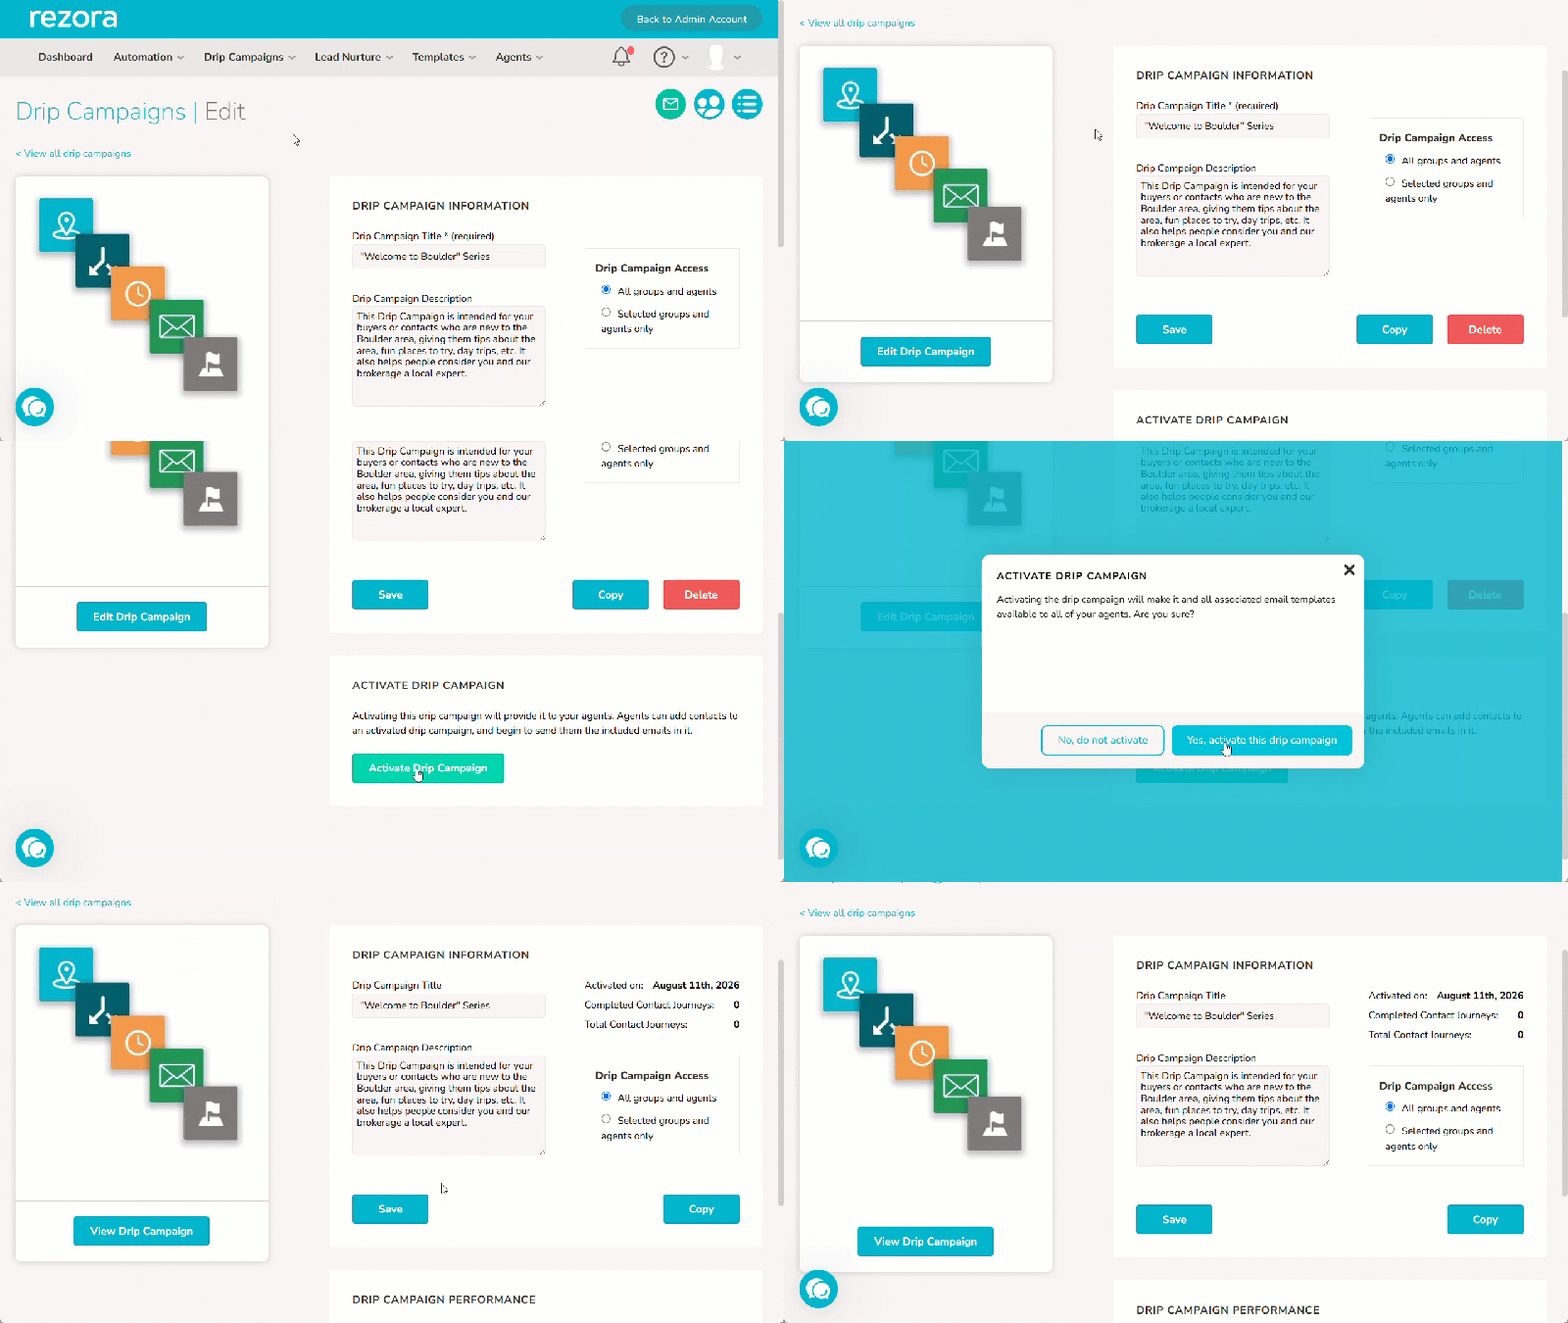
Locate your Drip Campaign and click on the title to reach the details page.
Scroll down to the Activate Drip Campaign button and click it to activate. You’ll need to do a quick confirmation.
Why Can’t I Activate My Drip Campaign?
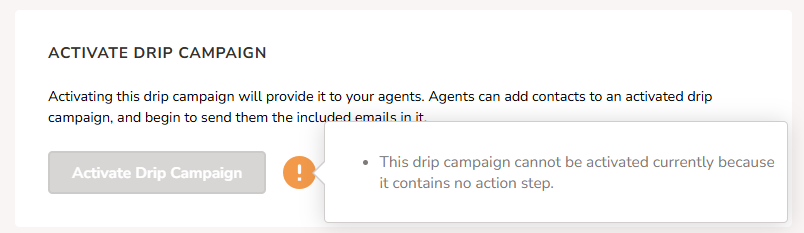
If your Drip Campaign’s “Activate Drip Campaign” button is greyed out with a yellow ! sign next to it, it means your Drip Campaign is missing something. Hover over the yellow ! sign for a description of the steps you need to take before you can activate this drip.
This message will change depending on what your Drip Campaign is missing. Another example is a Drip with no Wait or Branch steps between the emails.
In the example below, the Drip Campaign doesn’t include an Action in its flow. A Drip Campaign needs an action to have a purpose. Go back into the Drip and add one (or a few).
Providing Only Specific Agents or Groups access to a Drip Campaign
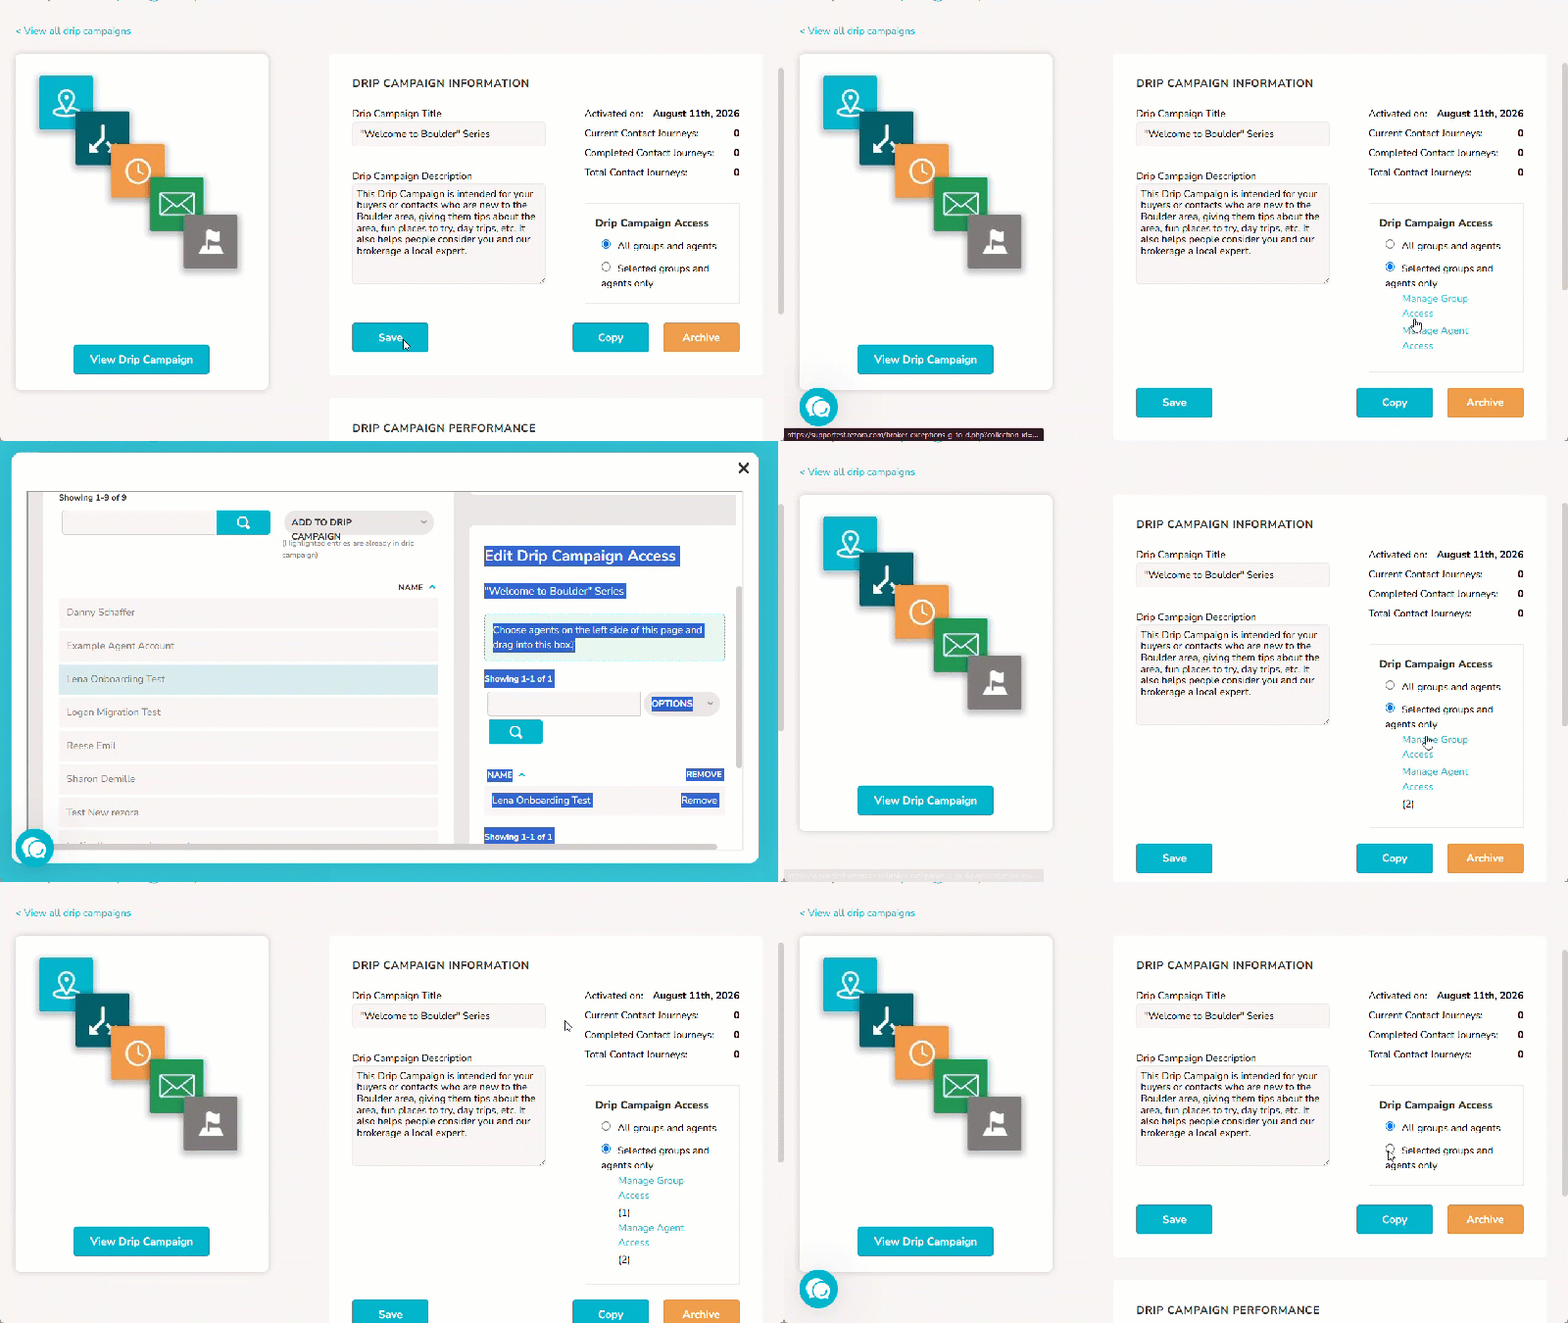
After activating your Drip Campaign, you can restrict it to specific accounts or Groups if the content is not relevant to everybody.
Head to the Drip Campaign Information area at the top right and make sure you have saved any changes you have made to the title or Description. Sometimes it is worth refreshing your page afterward.
In the Drip Campaign Access box, check the Selected groups and agents only option, then click Save. This will bring up the interface where you can click Manage Group Access or Manage Agent Access.
Click one of those options, then drag and drop the Group or Agent name from the left into the Drip Campaign Access area on the right. When you’ve added everyone, close the modal.
Make sure to Save your changes afterward.