How do I manage Groups in my Admin account?
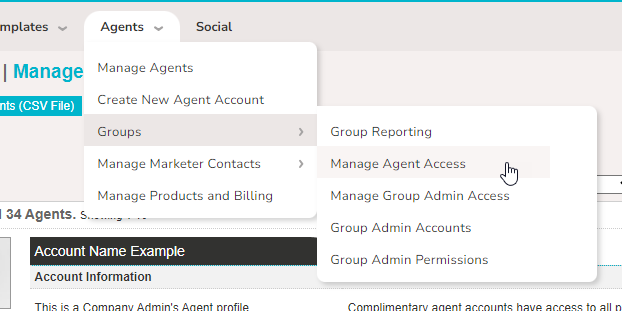
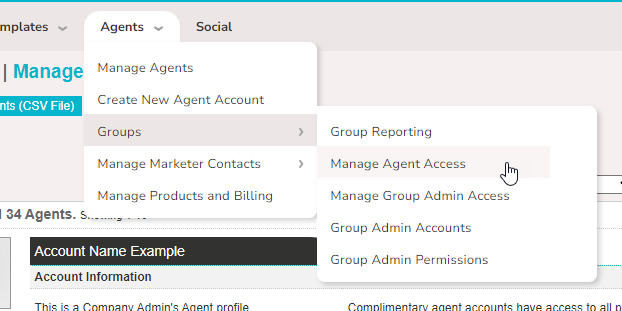
As an admin, you'll head to the Agents > Groups > Manage Agent Access menu to create new Groups, add Agents to Groups, and remove Agents from Groups.
Written By Danny Schaffer
In this video, we'll discuss creating and managing Groups, which will help you manage groups of agents as a whole more effectively. You can also view the text article below.
Creating a Group of Agents in the Admin account
Head to Agents > Groups > Manage Agent Access
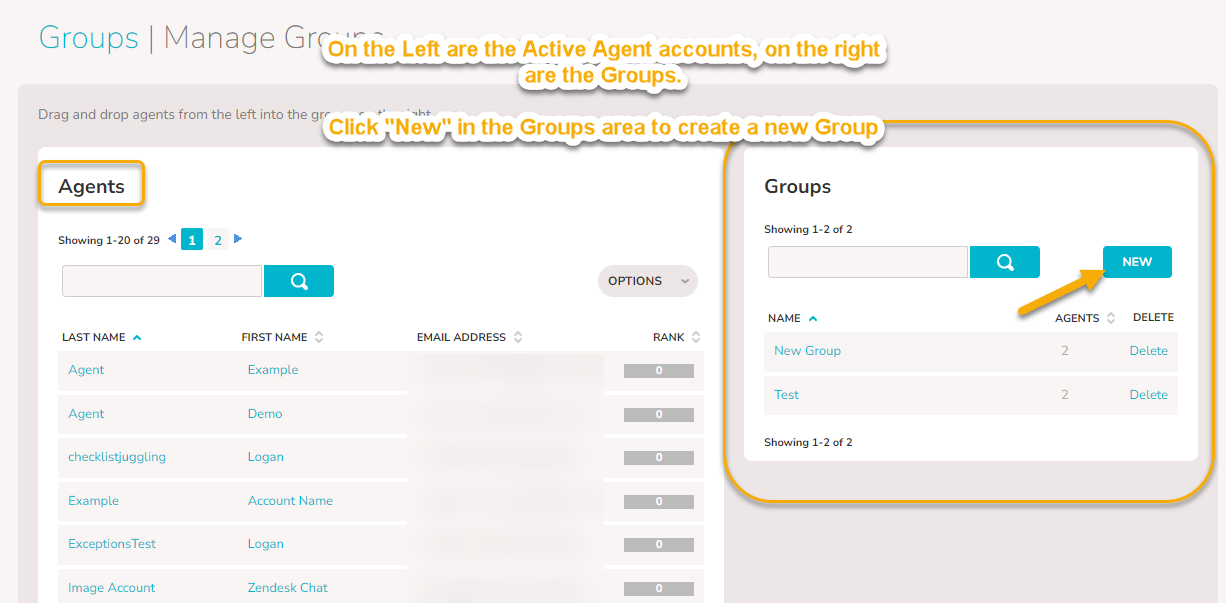
Click New in the Groups area to the right to create a new Group
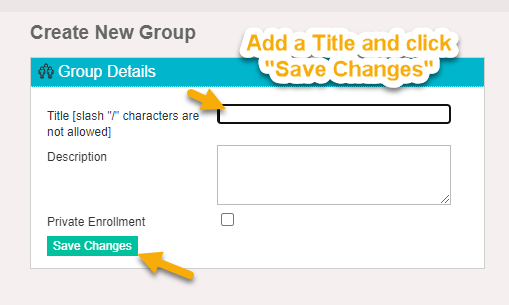
On the Create New Group page, add a Title (required) and a Description (optional)
You can also use the "Private Enrollment" checkbox to decide whether in the future you want the Group to have Private Enrollment only by checking the box (only admins can add agents to the Group) or if you want it to be public by leaving it unchecked (in future updates, allow agents to add themselves to the Group).
Click Save Changes
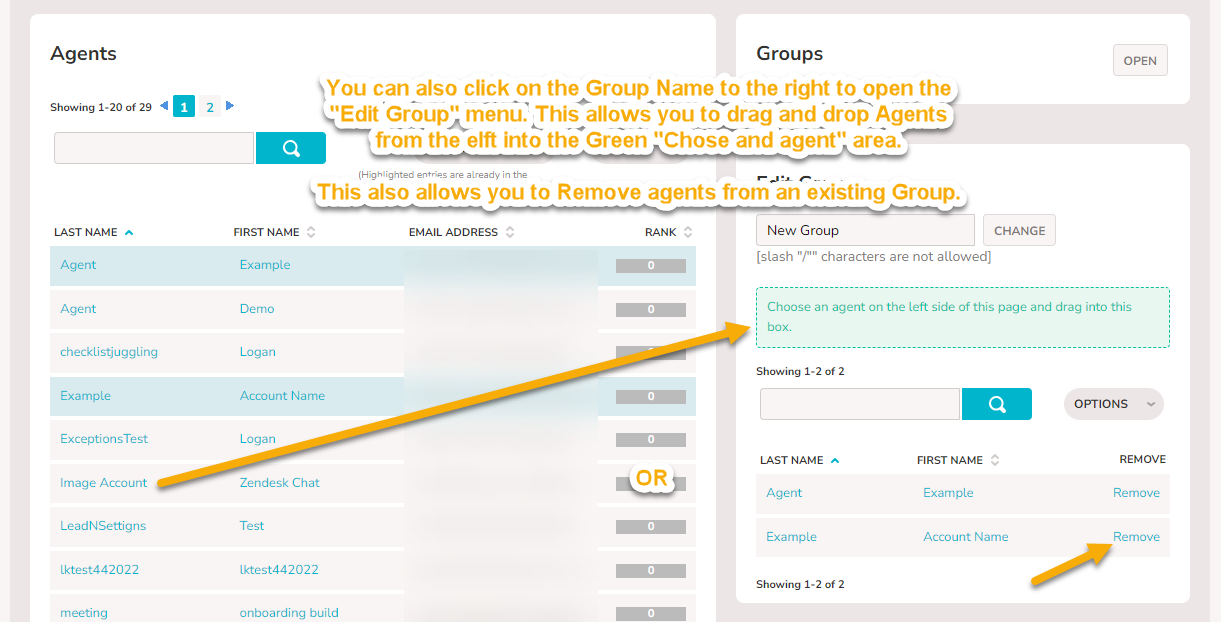
Adding Agents to or removing agents from a Group
Navigate to the Agents > Groups > Manage Agent Access page
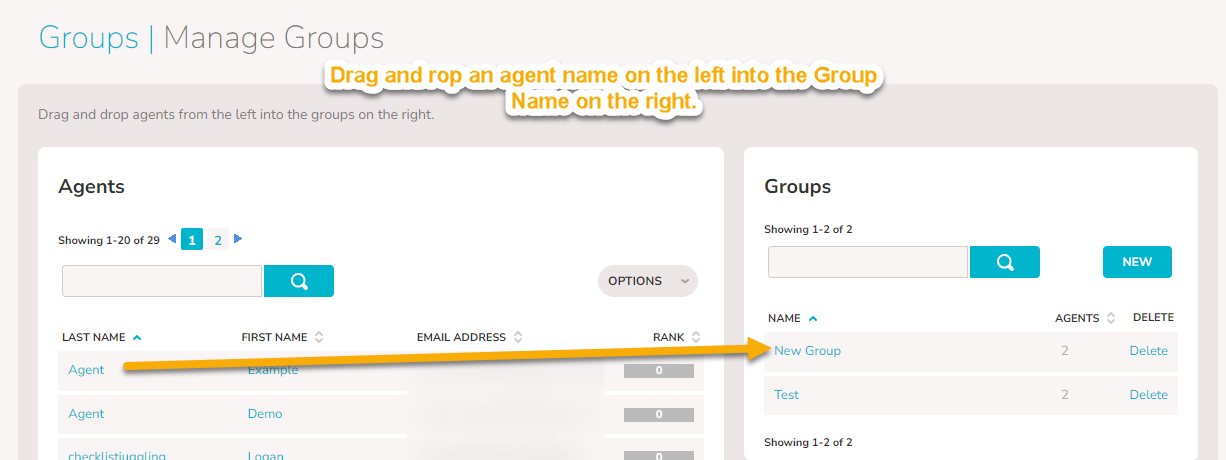
Drag and drop an Agent Name from the left into the name of a Group on the right.
Note: Only currently Active agent accounts will appear here.
Removing Agents from a Group
Navigate to the Agents > Groups > Manage Agent Access page
Click the name of a Group on the right to reach the more in-depth "Edit Group" menu.
In the “Edit Group” menu, click Remove next to agent names to remove them from the Group.
Note: Removing an agent from a Group will remove their access to templates they had access to *only through* that Group.